Thursday, July 30, 2009

Something "out of the box"

How cool is this little box? As I was browsing the Kaszazz demonstration information I came across the instructions for these cute mini gift boxes. The one I made isn't exactly how they instructed - I put my own spin on it.
I won't post the instructions because 1. it is SO easy, and 2. I will definitely run a workshop to make a set of these very soon... but you can see the pic :)
On the left is the materials, and the right shows the finished product... simple! It was part of their 5 Projects Quick (5PQ) and I can see why... it took me about 10 minutes - less time than a card!!!

Introducing Kaszazz!

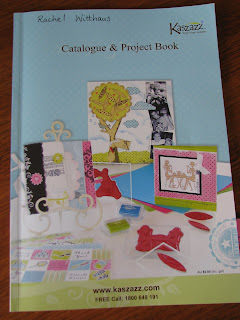
You may or may not have heard of a great Aussie company that sells and demonstrates craft products. It used to be known as Crafty Kids, but has changed it's name and is now called Kaszazz. I've seen the advertisements in SM magazine for ages - always inside the front cover... and I finally (after much debating) signed up. I was tossing up between Stampin' Up! and Kaszazz, but decided that Kaszazz was more my style because they have a whole heap of scrapbooking products as well as cards, stamps, inks, chalks and embellishments... their catalogue is 176 pages long - full of gorgeous craft products and ideas. I can't wait to get my hands on their mini albums! They always make great gifts full of photos for the grannies and rellies, or make a blank one as a gift for teachers, colleagues, friends, etc.


So, I've sent off my application, and have been given my login details and Consultant ID number, so now I just have to wait for the postie to deliver the goodies!!


Check out their website - which includes an online interactive catalogue of their products, or email me for a hard copy of their catalogue to either buy or borrow. http://www.kaszazz.com/


The exciting news is I am having my Kaszazz launch on Saturday the 22nd August, 2pm at my place in Werribee, so if you are at all interested please email me to let me know of your attendance: rachel.witthaus@gmail.com. It will be a "make and take" so come along and make a gorgeous and simple card and have some great afternoon tea and a laugh - with absolutely no obligation to buy anything... I know, I've been to umpteen tupperware, underwear, scrapbooking, card making, etc, etc demos and I always feel bad if I don't buy something (although very rarely will I not buy something... I'm a girl!) - but seriously it's more about getting myself some exposure and see where it leads. The more the merrier!


I will also be holding regular workshops at my place, some will be a Kaszazz product - like making a brag book, or embellished photo frame as featured in the product catalogue, and others will just involve bringing your own projects and using my (very varied) scrapbooking, cardmaking and craft tools - such as the cuttlebug, stamps, inks, embossing powders and heat gun. They may be mornings, afternoons, evenings, or weekends to try and mix it up a bit.


Also, don't forget that I will be hosting a Stampin' Up! Workshop at my place on Saturday the 15th August which will be run by Kylie Jo. Check out her blog at http://kyliebertucci.blogspot.com/. Again, email me if you would like to attend :)


I look forward to hearing from you!

Monday, July 27, 2009

Precious

... continued.
This is the card I made for my wonderful husband. It was supposed to be for our anniversary but I'm hopeless at keeping secrets, and I just couldn't wait to tell him what I got him for a present, so here's one for now... to go with the present and no doubt I'll make another for our actual anniversary.
I used Bashful Blue card as the base, a scrap strip of PP down the left side, and white card stamped with 'Paisley' background stamp using Baja Breeze ink, which I stamped twice and cut out the same piece on the bottom right so the pattern matched. I then used the words out of the 'Always' set to stamp the mixture of words using Not Quite Navy and raised this using foam.
This is the layout I finished - my first one of Miss Sophie. I used some Grace Taylor (Grant) pp as the base, with more from the same range as the photomat. 2 Large white flowers (Bella??) layered with 3 pastel coloured Kaisercraft paper flowers, with various brads for the centres (a pram, tiny feet and polkadots). I cut the title from Bazzill Bling paper using the Fancy Pants Alpha set and my Cuttlebug. There is also a strip of white skinny Fozz felt by Kaisercraft running down the right side of the photo. The Butterfly gets special mention as it was part of a baby present from my oldest friend Skye (we have quite literally known each other since birth). She made a beautiful 'bouquet' of paper butterflies and baby bottles on straws in a flowerpot - just gorgeous.

A little birdy...

As per my last post, here is the remake of that bird card:
In the original I tried to ink a branch for the bird to sit on, but my skills with a cotton bud failed dismally and it didn't match very well, and I tried to fade a smokey border around the inner square but it was quite grainy and looked bad... so here I have another attempt. Not sure I'm 100% happy with this but it'll have to do for now. The bird is from the Stampin' Up 'Always' set that I stamped with Versamark onto Chocolate Chip cardstock and heat embossed with gold powder, raised on foam. The Vanilla cards are stamped with the Pocket Silhouettes and Choc Chip ink - the base is stamped off once with most of the stalks ommitted. 'For you' is from the Fresh Cuts set. Finished with 2 gold brads and gold wrapping ribbon.
I still have one embossed bird left so might try and mix it up again and see what I can pull out.
My camera batteries have failed me again, so I'll be back with the rest a little later when they have finished charging (note to self... buy more AA rechargables next time I go shopping - we never have enough!).

Sunday, July 26, 2009

A nice afternoon crop

Wow, it's not until you need to pack everything that you realise quite how much stuff you have accumulated!
I woke up thinking what I would need to take with me to an afternoon crop at Angela's place and by the time I got to the table and started packing I realised I would need a bigger bag. It went something like this:
White card, Cream card, Chocolate Chip card, Pastels card, Brights card, cutting mat and cutters, 'work in progress' album, assortment of papers, Bazzill and Bazzill bling card, 3 lots of photos to go with some of the papers, jar of flowers, jar of brads, jar of fozz felt, tape runner and foam, mini inks (just in case), cuttlebug, cuttlebug dies and folders (I have 6 alpha sets which weigh a tonne on their own!), some ribbons, and a box of assorted rhinestones and pearls... oh and some embossing powders, heat gun, versamark, and why not take some kindyglitz and glossy accents - you know, just in case... Goodness knows how I managed to carry it all! And of course, I found that I only needed a quarter of what I took with me.
I did manage to get an awesome 'masculine-ish' card made for my delightful husband - which I will photograph later with his permission (who am I kidding? I'm going to show it anyway!), I finished my first official layout of Miss Sophie (which had been sitting unfinished for over 2 weeks) and I managed to make a start on another layout... and stamped and punched out lots of cardstock.
It is so nice to sit and create without worrying what Miss 4 is up to or being interrupted 10 mins in by Miss 0 wanting a feed (there goes the next 30 mins). Matt was left with 2 bottles of expressed milk and an assortment of dummies - and he managed to do a fine job - not that I had any doubts in his abilities.
I promised Ange that I would make a card using the bird from the Stampin' Up 'Always' set, so when I got home I set to work, but I wasn't happy with the end product. I intend to pick it apart and start again... be watching tomorrow for the reveal.
Anyway, I better stop being anti-social and get back to the in-laws... I'm also hoping this silly cold goes away. I hate snot!

Wednesday, July 22, 2009

Sketch 96

I thought I'd check out the Mojo Monday sketch this week, and seeing as I'd just used my CM circle cutters and they were still sitting out on my very messy desk I thought I should give it a go while I was in the mood (and the kids weren't wanting me).
So this is what I came up with.
It's only small (approx 3 x 3 inch) but it's easy to fill a small card when it's a fairly plain design (see http://mojomonday.blogspot.com/ for the sketch). The base is Vanilla cardstock and I used Almost Amethyst card and ink. The stamps are Kaisercraft (those ones I said I really liked but haven't really used). Embellishments are some recycled gift-wrap ribbon and Kaisercraft pearls and rhinestones. I think if I did this same card again I would clear emboss the butterfly image to give it a bit more shine. It would probably also look good done in black and white with a black or gold embossed butterfly.

Fresh Cuts


I realised when I returned the borrowed truck-load of stamps, that I hadn't even opened and mounted my new Stampin Up sets of stamps. I couldn't wait to try out the Fresh Cuts set... so yesterday when I finally got some time to myself (a.k.a after the kids are in bed) I stamped out the images in 2 colours - Black and Chocolate Chip - both onto Vanilla cardstock and cut them out. I used my CM oval and circle cutters for the sentiments and added the Kaisercraft pearls for a bit of shine.
The chocolate one uses Chocolate Chip cardstock, with the 'thank you' circles raised using foam, and the flower is raised again.
The black one uses Kaisercraft To Have and To Hold paper underneath the large square stamp, which is raised using foam and the 'thank you' oval with flower are raised again.
Both cards are approx 4 x 4 inches.

Monday, July 13, 2009

Stamps Galore

I ordered some new Stampin Up stamps from my friend, and when she delivered them she also delivered an enviro bag full of stamp sets for me to borrow for the weekend. I've stamped out a whole heap of images that can be cut out later on when needed, and I embossed a few cards that can be embellished later on. I'm totally loving the Baroque Motifs set! I must put that one on my "wishlist". Anyway, just a brief post because I need to get back to putting these stamps to some good use. I should have some gorgeous new designs to share when I return.

Saturday, July 11, 2009

In true "mother" style...

I made 2 cards on Tuesday using the mojomonday.blogspot.com week 94 sketch and I even took photos of them, but it has taken me this long to post them online. Might have something to do with a 4 year old and a newborn (who is growing very fast :( ). I really liked this sketch - you know how some just appeal more than others? I have plans for more using this same sketch and variations on it, but these are the 2 already made. I'd better post them quick or it might take another 3 days to get back on here!
This is the first one I made using the sketch, and I wanted to use some of my Kaisercraft Acrylic stamps - some that I have neglected for a while but are so beautiful. I used the dragonfly from the set and using an embossing pen, I 'coloured' the stamp (you could also use versamark) and stamped it onto white cardstock, then sprinkled gold embossing powder over the stamped image. I also drew a border around the rectangle using the pen and embossing powder, and waved the heat gun over it all. Once it was heat embossed I used a paintbrush and some Versa ash rose ink to stipple around the dragonfly and coloured the centre of the flowers in yellow felt tip pen. The rest of the card is scraps of paper from my huge pile of offcuts, and some twill ribbon, finished with 3 Kaisercraft brads and the words stamped from the Stampin' Up congrats set using black ink. I think the background of the plain pink is just that - a little too plain. If I were to re-do this card I'd stamp a background image on the pink cardstock.
This second card is IMO much nicer and 10 times simpler. The dragonfly panel was done exactly the same as above except it was left white, and the rest is some shimmer gold card and some gold printed vellum, all on a Kaisercraft Copper card base. I buy these card bases from Spotlight - they come in about 20 or more colours and are $2 for a pack of 6 cards and matching envelopes. The advantage is that they are precut and folded for you! Again the word was stamped from the Stampin Up congrats set in black ink.
Heat embossing is so easy once you have a heat gun and some powders, and the effect is really striking, especially when used for intricate designs and it adds to the texture of a card.
Hopefully there will be more cards to come shortly...

Tuesday, July 07, 2009

Sketch 93

This is a card that I made using the mojomonday.blogspot.com week 93 sketch. I had a relative of a friend move in a block away so I made up a batch of bikkies and took this card over - my good deed for the day.

This card was made using the Stampin' Up priceless set and moss and blush inks/papers. The title was printed on the computer and cut out using my CM circle cutters. The scallop edge was using the Fiskars Threading Water punch. Sorry it is not great quality - it's scanned cos my camera batteries were flat.

It's not only the destination, it's about the journey...

As this is my first post I will share a little about myself.
My name is Rachel and I live in the outer suburbs of Melbourne, Australia.
I am married to my awesome husband Matthew, and together we have 2 gorgeous girls - Emily who is 4 and Sophie who is a newborn.
I was introduced to scrapbooking about 4.5 years ago when I was pregnant with Emily and a friend held a Creative Memories class. It wasn't until after Emily was born that I actually bought some supplies and got inventive with some pages that my obsession took off. I also blame my friend Steph, who started an online group about scrapbooking - where I learned there was a whole other world of scrapbooking outside of Creative Memories. Since this time I have steadily accumulated a range of products for stamping and papercrafts. My absolute love is patterned papers and stamps... hence the "I Heart Stamp n Scrap".
I made a few cards when I was starting out, but I never really liked what I produced - but with some persistance and a lot of 'rubbish' cards I think I am satisfied with the majority of what I now produce, but I don't think I could do it without sketches and getting ideas from galleries.
For those lacking inspiration the Little Scrapbook Shop (affectionately known as LSBS) has a forum and monthly cyber-crops - where they post challenges with various themes or guidelines. It is well worth a look http://www.littlescrapbookshop.com.au/.
Since about 2 years ago I have also subscribed to Scrapbooking Memories (SM) magazine where I find lots of inspiring layouts and ideas - and discover yummy new products to buy!!! An ambition of mine is to one day be published in SM but I guess it's a bit hard when you don't send them in...
I would also like to better perfect my photography - beyond my current point and click ability.

Anyway, I shall be back shortly to upload some recent creations.

xx Rachel.